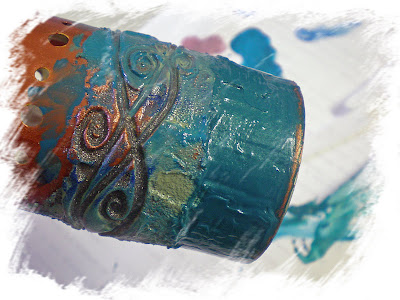
This is where I started...an empty yeast tin...I punched holes around the top of the tin using my Crop-a-dile. Two small ones opposite each other at the very top (these will be used to hang the voltive) then two rows of holes just below....

The next step was to coat the entire tin with copper precious metal paint...don't worry if it runs as this is just the base coat for the crackle paint applied later. Allow this to dry completely.

For the next step I smeared Viva Ferro paint around the middle section of the tin then it rolled over my damp Tanda Klimt border stamp to make an debossed impression in the Ferro paint. I then allowed this to dry. NB it is very important to clean the stamp straight away otherwise it will be completely ruined!

Using my fingers I worked various acrylic paints into the Ferro and finished off with some more precious metal paints again using my fingers again this was allowed to dry

Once this was dry I plastered the bottom section of the tin with a thick layer of Viva Croco paint. Using a spatula I got a reasonable smooth finish this was allowed to dry and crack. Then I plastered more Croco paint around the top of the tin. This time the holes were a little tricky so I decided to to the equivalent of the snow icing on Christmas cakes, you know the one where you bounce the palette knife up and down to deliberately get a rough texture....this way my holes reappeared!

When everything was dry I found that some of the cracks had gone all the way back to the tin in places so I rubbed some more acrylic and precious metal paints into the cracks and then finished off with a few spritzes of glimmer mist
 . I touched up the rims of the tin with copper precious metal paint and then my tin was ready for the next stage.......
I decided that I probably needed some more holes in my tin so that air could circulate enough to let the night light burn efficiently. I thought that holes in the bottom would allow cool air to be sucked in and the holes at the top would allow the hot air out so I punched some holes using a hammer and a large nail.....

Now it was time to add some more decoration. I threaded some copper lined seed beads onto some fine olive jewellery wire
 . This was then wrapped and threaded though the top row of holes then tied off inside the tin.
Using a wire jig I bent some thick copper wire in a series of loops to form the h
 andle of the voltive..each time I made a loop, I simply lifted it off the jig and moved it along to make the next loop, this way I got nice even loops. Make sure you make an odd number of loops otherwise your voltive will not hang properly.
I made 7 loops on my handle. Here it is ready to be attached to my tin.....

I passed my wire through the two small holes (already mentioned in step 1) and then wound two more loops on the outside of the tin.
 I was going to dangle some beads from these two loops but then I changed my mind....
 I decided to use my olive jewellery wire and do some crochet....I threaded some pretty co-ordinating beads onto the wire, then using a large crochet hook I did a simple chain stitch pulling a bead into each stitch...
this was then laced through the loops of the handle ....et Voila....a pretty night light, perfect for all the lovely evenings we hope to have this summer...fingers crossed.
I cannot guarantee how weatherproof this will be so I'm keeping mine indoors!
I'm really peased with how this turned out...it was a bit of an experiment and I had no idea how it would turn out from one stage to the next.
I hope that this little project has inspired you to alter a tin of some kind or to use any of the techniques I have used, it would be great to see what other people do with these ideas!
Sue
x


5 comments:
Simply stunning.
Wow! Amazing. Such a pretty candle holder for the garden. I guess you could clear varnish it - that should work for the great outdoors? I'm only guessing.
Lesley x
Sue this is stunning and thank you so much for the excellent tutorial and photos. Great Idea.
x x
Amazing - and thanks for the "How Too" - x Hilda
I just love this the textures and colors are amazing!!!!
Post a Comment