Thursday 29 March 2012

Revamp and Update with Tanda


For the current "Tanda Teaser" the
brief is to revisit a piece of work that you have already completed and then
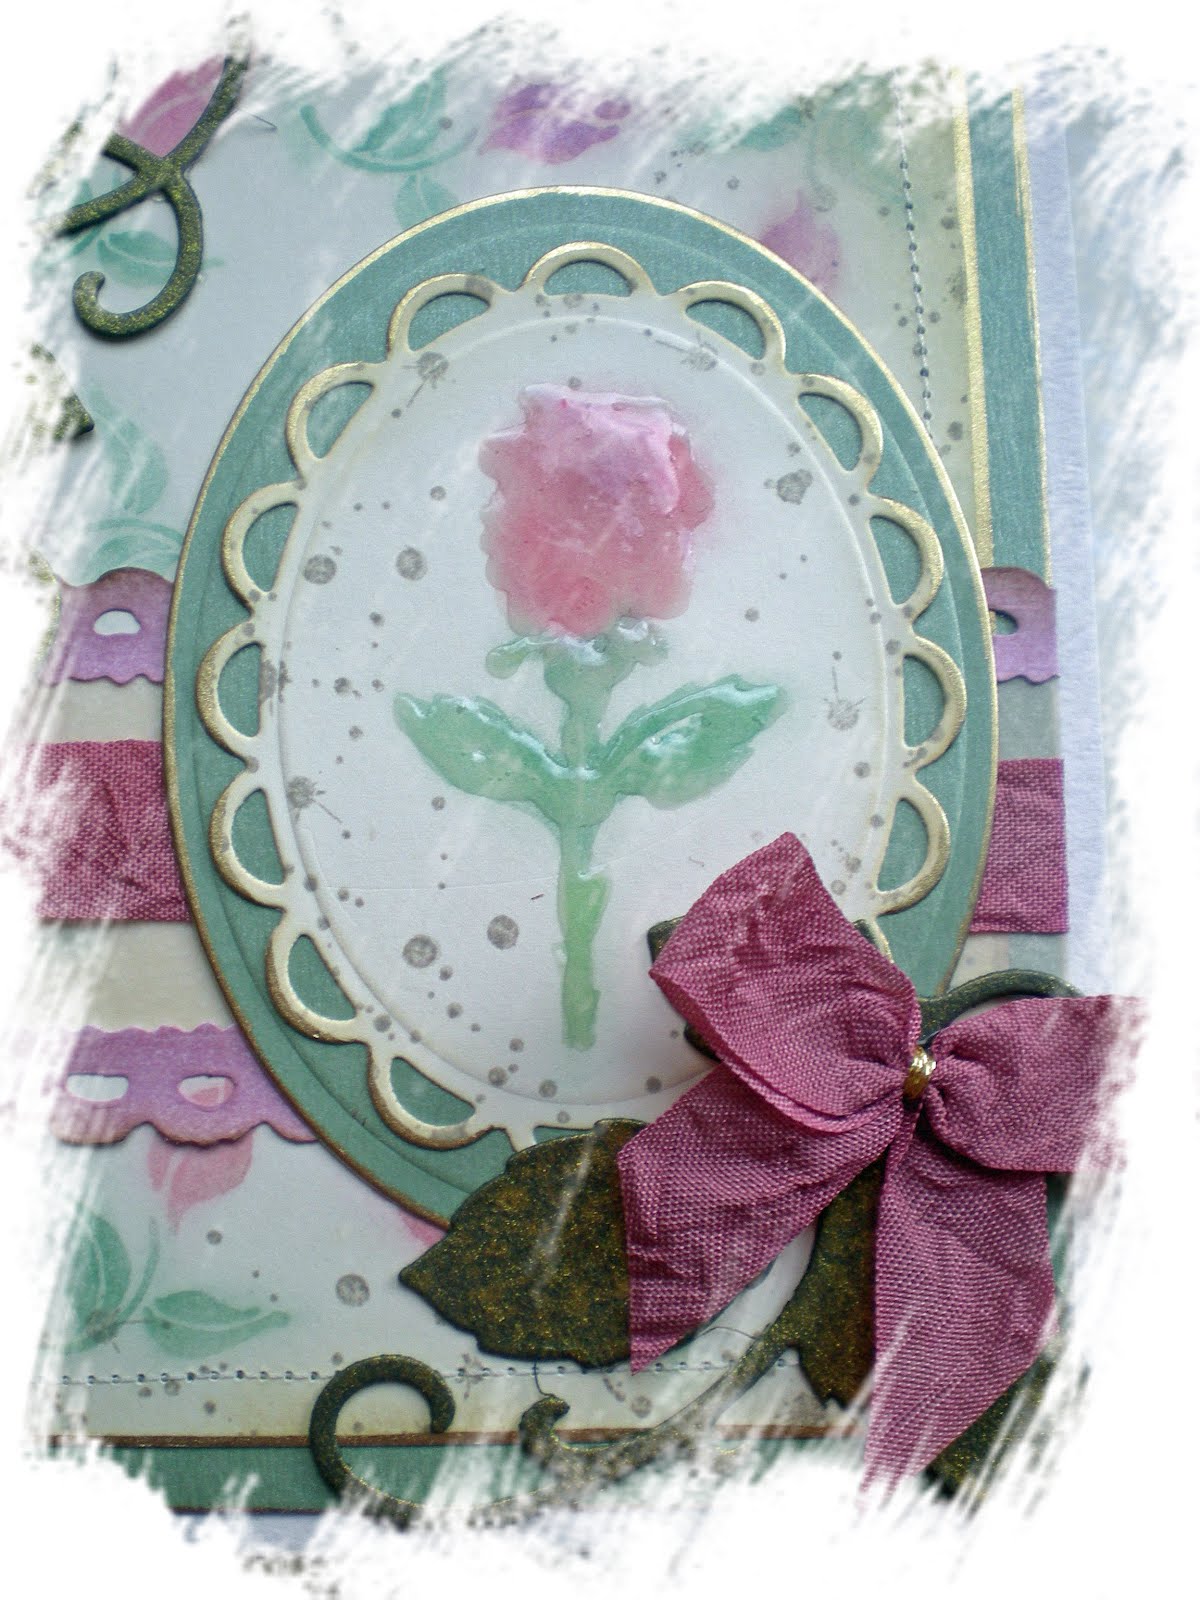
update it. The first picture shows the sample I made using using the Tanda mack 2 set. This has been living in my drawer at home for a couple of years and I decided that I wanted to update it and make it a bit more special before I sent it to my Sister in Law for her birthday.

The following pictures show the finished card.....

The first thing I did was to run a line of zig-zag stitches around the edges of the water colour paper, then a line of straight stitches around the edge of the grey matted card. I stamped the edges of the card with an ink splatter stamp from PaperArtsy using Victorian Velvet distress ink. The flowers, leaves and tag were die cut from hand-made paper using a mixture of spellbinders and Tim Holtz dies.

I've probably upset all the clean and simple fans out there, but I have to say that I am pleased with the resulting card.

I would like to enter this into the following
challenges:
"Make it Monday - Anything goes"
"Marks finest papers - shades of pink"


"Stamps & fun - Make your own flowers"
"the Crazy Challenge - Add a Sentiment"
"Sweet Stampin' - Anything goes"
"Simon Says Stamp - anything goes"

Tuesday 27 March 2012

New Wendy Vecchi Stamps


We have been treated to another set of "Wendy Vecchi stamps" to play with and they are
beautiful! When Ryan emailed us all to
show us what the "Creative Expressions" design team
were getting this month I could see that they would go perfectly with the Wendy
Vecchi stamps that we were sent a couple of months back.

For my card I have used the lacy background from the
first set (Sentimental Art) and the lady and background ledger stamp from this month’s set(The Voice of Art).

I stamped the lady in smoky grey Versafine onto a circle
die cut. I masked her and then stamped
the ledger over the top in pumice stone.
When I cut the mask I left a small border around the lady so that the
ledger would be thrown even more into the background. The edges of the circle were then distressed
with pumice stone distress ink. The next
circle was cut from smooth white card using a spellbinders die, this was then
distressed with chipped sapphire distress ink.
The next layer on the card was stamped using Versafine and the lacy
stamp and then distressed with pumice stone.
The bottom layer was stamped in Cobalt blue archival ink using the
ledger background. By stamping it on the
diagonal I was able to stamp around the edges without any obvious
overlaps. The bottom two layers were
stitched together and then I chose a fancy leaf stitch to stitch the seam
binding across the bottom third of my
card.

The tag was cut using the same set as the blue circle,
just a smaller die. I then cut it into a
tag shape using a scalpel and metal ruler.
I stamped this with the lace stamp in pumice and distressed the
edges. The sentiment was stamped in
chipped sapphire. The ribbons are seam
binding dyed with chipped sapphire distress ink. The flower is made with hand-made paper using
a spellbinders die. The leaves and
flourish behind the flower are cut using the heartfelt dies that we were using
for the last month.

I would like to enter this card into the following
challenges:

"bunny Zoes Craft - shabby chic/vintage"
"Made Especially for you - Distress"
"Stamps & Fun - Make your own flowers"
"the crazy challenge - add a sentiment"
"secret crafter - shabby chic vintage"
"Gingerloft - Happy Birthday"
"One Stitch at a time - anything goes"

While I’m here I thought I would share some pictures from
our little trip to Zell am See. Zell was
really pretty so here are some pictures of the lake and the town, and some of the skiing.


Tuesday 20 March 2012


Sorry things have been a bit quiet here...I've been away for the last week and I'm still catching up!

This is my next Creative Expressions Dt piece using the heartfelt stamps and dies. I used a versamark ink pad to stamp the images then used chalk to colour the images. The background was made using the rose bud stamp. The seam binding was dyed using Victorian velvet distress stains and the leaves were made using one die cut from the heartfelt die set cut in two. The main rosebud image was stamped onto an oval cut from the spellbinders lacy oval set.


I would like to enter this into the following challenges:
"Crafty bloggers network"

"Love to Create - anything goes"
"Make it Monday - anything goes"
"Simon Says Stamp - make your own background"
"sparkles forum challenges - Mothers day"

Monday 12 March 2012

Cosmic!


This is a bit of an experiment....so I'm not sure how this is going to turn out...pictures may appear in strange places.

This is my 3rd DT piece for "Creative Expressions"using the heartfelt bella rose stamps and dies. I stamped the rose and leaves onto black card with versamark and then dusted them with cosmic shimmer mica powders. I then fixed the powder by using cheap hairspray. I distressed the edges of my card with a thread cutter and then swiped a gold Krylon pen over the top of this to give a really distressed look. I also sprayed the stamped card with gold mica powder. I layered my card up with cream and green vellum and seam binding dyed using a bundled sage re-inker.

Monday 5 March 2012

Heartfelt Mother's Day


My next piece for Creative Expressions features the Heartfelt Bella Rose Bold stamps and matching dies. For my card I die cut 6 rose buds in a fairly smooth, but absorbent card stock. I inked up my stamp using some Marvy le Plume pens that I've had for ages...roll on the arrival of the new Distress Markers...(need to save my pennies big time!). I then pressed the die cuts onto the stamp. I found it easier to get the die and stamp lined up this way. I then coated the rose buds with glossy accents and allowed them to dry. I didn't spritz the stamp with water before stamping because the glossy accents makes the ink bleed....can you guess I what you see here is my second attempt? Just thought I'd save you making the same mistake!
>My card base is heavy duty acetate. I stamped the tiny rose bud randomly around the outside in Saddle brown staZon. When making an acetate card you need to be careful to line things up so that each side of the acetate is perfectly covered. To do this I used the Spellbinders Lacy Oval die cut out 4 times. I distressed and stamped these ovals in Spiced Marmalade Distress Ink.

When my rosebuds were dry I curved them carefully so as not to crack the glossy accent coating. I worked out my positioning first then stuck two leaf flourishes (one cut down)(dark green pearlised card) so that they would be under my bouquet. Then I mounted 5 rose stems on the front of the card using silicone glue to form a bouquet. I chose to use silicone glue so that I had time to move them around and it also gave me time to poke in the sprigs of foliage...(The foliage was the spiky leaf die cut up)(again dark green pearlised card).

I also stuck a single rose bud on the inside of the card and finished the card with a tag tied on with an organza ribbon.

I would like to enter this card into the following challenges:>

"Classy Cards and Such - Flowers"
"Clearly Inspired - Anything"
"Crafty Catz - Punches/Dies"
"The Stampman - Use colours of spring"
"Stempelsonne Challenge - A Flower for You"
>
"Wags and Whiskers - Spring or Travel"
"Crafters Companion - Spring"
"Cup Cake Craftroom - Spring bouquet"